1. Introduction: Demystifying Unreal Engine’s Build Process
If you’re a C++ developer stepping into the world of Unreal Engine—or even a seasoned programmer puzzled by its build system—you’re not alone. Unreal’s build process introduces unfamiliar concepts like macros (UCLASS, UPROPERTY, GENERATED_BODY), generated header files, and the intermediate folder.

It can feel overwhelming at first, but understanding how it all works will make you a much better programmer.
At the core of Unreal’s build process are the Unreal Build Tool (UBT) and Unreal Header Tool (UHT). These tools enable Unreal’s modular architecture and bring modern features like reflection, garbage collection, and network replication to C++. With this article, you’ll gain a foundational understanding of the build system and how it all works together.
To simplify things, I’ve divided the topic into two parts:
Part One (This Article):
- We’ll explore Unreal’s modular architecture, the folder structure of modules, and the role of Build.cs and Target.cs files in the build process.
Part Two:
- We’ll dive into the Unreal Header Tool (UHT), the magic behind reflection, and how it powers critical features like Blueprints, serialization and garbage collection.
By the end of this series, you’ll be well-equipped to tackle Unreal’s build system with confidence. Let’s get started!
2. Unreal Engine’s Modular Architecture
Unreal Engine’s modular architecture is the backbone of its scalability and flexibility. The Engine consists of hundreds of different modules. Each module is a self-contained package of code and resources, designed to handle specific functionalities. This modular design ensures efficiency by including only the features your project needs.
2.1 What Are Modules Exactly?
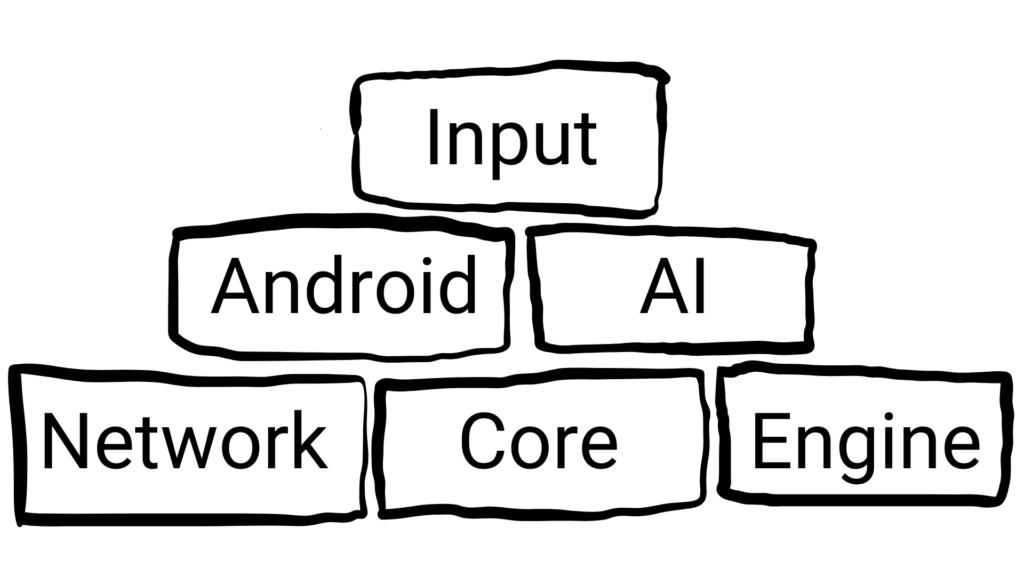
Modules are like LEGO bricks. Each one has a specific purpose, and you can mix and match them to build your game. For example:
- Core: Basic utilities like math and string handling.
- Engine: The foundation for rendering, input, and physics.
- GameplayAbilities: Advanced gameplay systems like abilities and effects.
- Your Custom Module: A module you create, such as “InventorySystem” or “CombatMechanics.”
2.2 Engine Module Folders
Let’s explore the folder structure of Unreal Engine modules. Most engine modules are located in the directory Engine → Source, organized into subfolders based on their purpose:

-
Editor Folder:
Contains modules for editor functionality (e.g.,BlueprintGraph, AudioEditor). These modules are excluded from non-editor builds to optimize runtime performance. -
Runtime Folder:
This is where you’ll find modules essential for the game at runtime. Examples include:- Core: Provides foundational utilities like math functions, strings, and arrays.
- AIModule: Powers AI systems such as behavior trees and pathfinding.
- Slate: Handles UI rendering and interaction systems.
-
Developer/Programs Folders:
Contain tools for profiling, build automation, or debugging
Key Takeaway: Everything is a Module
In Unreal Engine, nearly every component is structured as a module. This includes:
- Engine Modules: Core systems like rendering, physics, and input.
- Editor Modules: Tools and utilities exclusive to the Unreal Editor.
- Game Modules: Your project itself is a module, allowing it to seamlessly integrate with the engine’s modular architecture.
- Plugins: Every Plugin that contains code is a modul.
2.3 Structure Of A Module
2.3.1 Build.cs Files: Configuring A Module
Let’s start with the Build.cs file. You might think “Hey, isn’t the Unreal Engine written in C++. Why the heck do I need a C# file all of a sudden?” Well, of course you are correct, the Engine and the modules are written in C++. But the Unreal Build Tool (UBT) is written in C#. This Build.cs file tells the UBT how to compile your module, what dependencies it has, and how it should behave during the build process.
Here’s an example of a basic Build.cs file:
using UnrealBuildTool;

public class MyProject : ModuleRules
{
    public MyProject(ReadOnlyTargetRules Target) : base(Target)
    {
        PCHUsage = PCHUsageMode.UseExplicitOrSharedPCHs;
        PublicDependencyModuleNames.AddRange(new string[] { "Core", "Engine" });
        PrivateDependencyModuleNames.AddRange(new string[] { "Slate", "SlateCore" });
    }
}
You can use plenty of options to configure how your module is built. Here is the link to the official Unreal Engine documentation, listing all options:
https://dev.epicgames.com/documentation/en-us/unreal-engine/module-properties-in-unreal-engine
Two of its most important components are the Public and Private Dependency Modules, which define the relationships between your module and others.
PublicDependencyModuleNames:
Lists modules that your module requires to function and exposes their functionality to other modules. If a file in your module’s Public folder includes headers from another module, you must add that module to this list.PrivateDependencyModuleNames:
Lists modules that are only used internally within your module. These modules are not exposed to other modules that depend on your module.
Best Practices for Dependencies
Start with Private:
When you need to use another module, start by adding it to the PrivateDependencyModuleNames list. This keeps your module’s dependency scope minimal.Move to Public when necessary:
If a header file in your Public folder includes a file from another module, move that module to the PublicDependencyModuleNames list. This ensures the module is accessible to others that depend on your module.
Why Is This Important?
Properly categorizing dependencies minimizes unnecessary exposure and keeps your code clean, modular, and maintainable. It also improves build times and prevents accidental coupling between unrelated modules.
Now, you might wonder, “What’s this public folder you mentioned?” Time to look at the folder structure of a module.
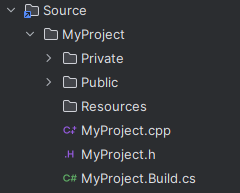
2.3.2 Folder Structure Of A Module

Unreal Engine modules are structured to separate public and private code. As the names suggest, they have a similar function like access code modifiers.
Public Folder
- What it does:
Contains header files that other modules can access. Think of it as the “interface” your module offers to the rest of the engine. - When to use:
Classes, functions or constants in this folder are meant to be shared. If another module declares your module as a dependency in its Build.cs file, it can use what’s in your Public folder.
Tip: Always include only what’s necessary to expose functionality while keeping implementation details private.
Private Folder
- What it does:
Contains implementation details, such as .cpp files and headers not meant to be accessed by other modules. It’s your module’s safe zone for internal workings. - Why it’s useful:
Helps encapsulate code, reducing unintended dependencies and making your module easier to maintain.
Tip: Keep headers private unless other modules truly need to access them. This keeps your module lightweight and avoids unnecessary coupling.
Resources Folder (Optional)
- What it does:
Stores images, icons, or other non-code assets that your module might need. - When to use:
Use this folder only if your module includes assets. Otherwise, feel free to leave it out.
2.3.3 Conclusion
In summary, the Build.cs file and the folder structure are your best friends for organizing and configuring your Unreal Engine modules. By carefully managing public and private dependencies, and keeping your code neatly separated into Public and Private folders, you ensure your module stays clean, modular, and easy to maintain.
2.4 Build Targets: Client, Server And Editor
With this foundation set, how does the build tool know which modules are needed for your game? The solution is another C# file: Projectname.Target.cs. If the Build.cs file is about managing individual modules, the Target.cs file is the game plan for the entire project. It tells Unreal Build Tool (UBT) how to package your game—whether it’s for the editor, the final game, or even a dedicated server.
2.4.1 Anatomy Of A Target.cs File
Here’s an example of a Target.cs file:
using UnrealBuildTool;
using System.Collections.Generic;

public class MyProjectTarget : TargetRules
{
    public MyProjectTarget(TargetInfo Target) : base(Target)
    {
       Type = TargetType.Game;
       DefaultBuildSettings = BuildSettingsVersion.V5;
       IncludeOrderVersion = EngineIncludeOrderVersion.Unreal5_5;
       ExtraModuleNames.Add("MyProject");
    }
}
Let’s break it down!
Target Type:
The Type property tells UBT what kind of build you’re creating. In this example, it’s TargetType.Game, meaning it’s the final game build players will use. Other possible values include:
- TargetType.Editor: For development builds, with editor tools and debugging utilities.
- TargetType.Server: A lightweight version of the game designed to run as a dedicated server.
- TargetType.Client: The client-side build for multiplayer games.
Default Build Settings:
The DefaultBuildSettingsproperty specifies which version of Unreal’s build settings to use. In this case, BuildSettingsVersion.V5 ensures that the project uses the latest and greatest settings for Unreal Engine 5.
Include Order Version:
This controls how Unreal Engine organizes header files internally. Think of it as a system to avoid include conflicts and keep the build clean and efficient.
ExtraModuleNames:
Summary:
The Target.cs file is where the big-picture decisions about your build are made. It defines what kind of build you’re creating, configures global settings, and ensures all the right modules are included. If the Build.cs file is the blueprint for a single module, the Target.cs file is the blueprint for your entire project.
3. Summary: Pulling It All Together
You’ve now explored Unreal Engine’s modular architecture, folder structure, and the roles of Build.cs and Target.cs files. By understanding these components, you can structure projects more effectively and take full advantage of Unreal’s build system.
But the story doesn’t end here. The real magic lies in the Unreal Header Tool (UHT)—the engine’s secret weapon for enabling reflection, Blueprints, garbage collection, and more. In Part 2, we’ll uncover how UHT works behind the scenes to transform your code into a powerhouse of functionality.
Stay tuned—Part 2 is where the magic happens!